What is enrolment?
Enrolment is the process of enabling new users to create their personal log-in for ReachMoreParents and inviting Parent users to the mobile app and staff users to our desktop platform.
Who can enrol users?
Current school staff members with System Admin permissions can enrol new Parent and Staff users. If you cannot view any of the settings or menu options shown in the instructions below, please contact your schools System Admin.
How to enrol individual users – step-by-step instructions below
-
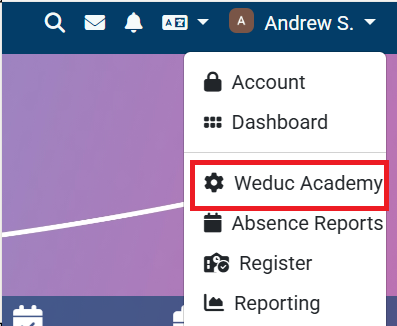
Log into ReachMoreParents and click on your name (Profile Menu) in the top right corner of the home/newsfeed screen

-
Select the school name from the drop down menu.
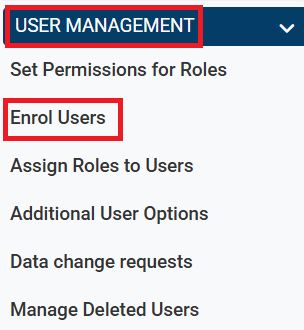
3. Go to the menu of the left side of the screen. Locate the 'User Management' section and then click 'Enrol Users'
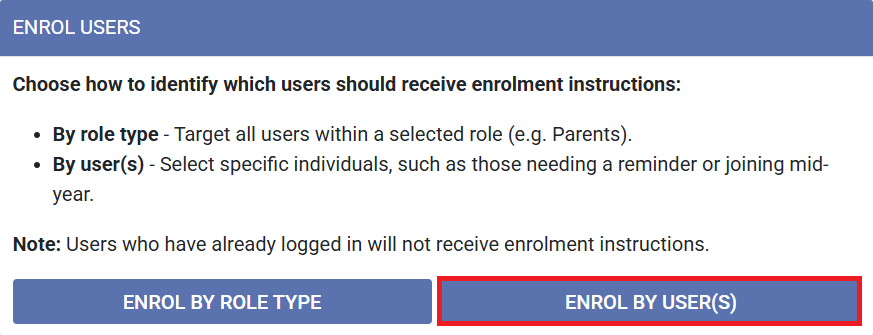
4. You will see an explanation of your two options for enrolling staff/parents/carers. Click the 'Enrol By User(s)' button.
When to Enrol by role type (Target all users within a selected role type)
- Select this when launching ReachMoreParents for the first time or at the start of a new academic year.
-
For further options, please see our Bulk enrolling users by role/ group article.
When to Enrol by user (Select specific individuals you wish to enrol)
- Select this when new parents need app access or staff join the school throughout the year.
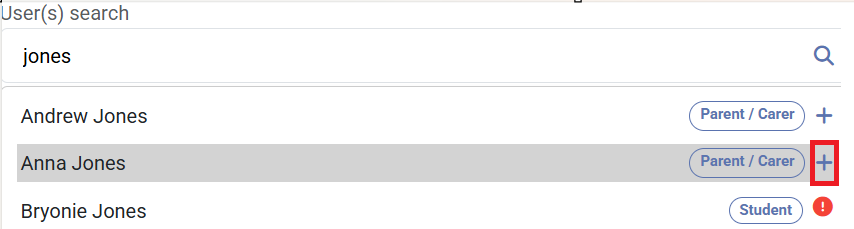
- Start typing the user's name you wish to enrol into the 'User(s) search' bar.
NOTE - If the name you are searching for does not appear, please contact our support team by emailing support@weduc.com
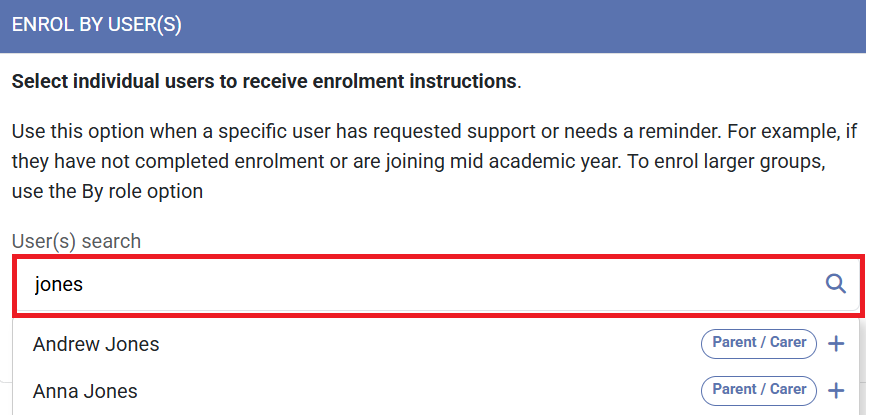
5. Click the + symbol next to any user you wish to enrol.
If there is an exclamation mark next to the user's name, this means they are already enrolled and cannot be sent another enrolment message.
The next options will explain the steps depending on which enrolment method you choose - email, SMS or letter.
We recommend email as the simpliest, no cost option but provide two other methods for exceptions.
6A - Enrolling by Email (default)
By default, enrolment messages are sent via email. This is to ensure mistakes aren't made with users entering another user's code and it's free to send!
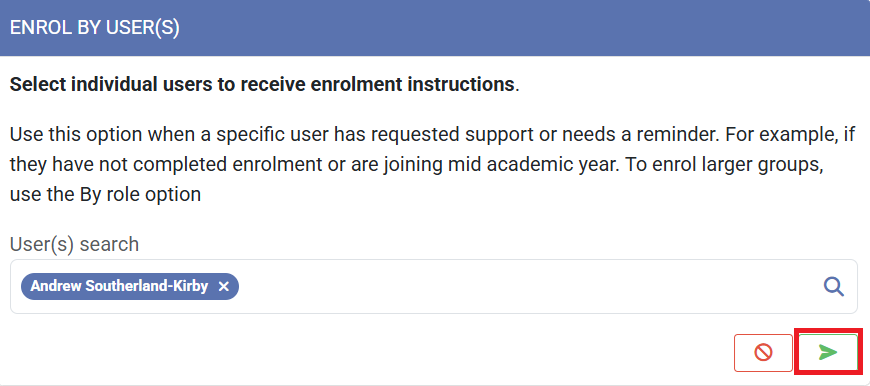
After selecting the users you wish to enrol, if no further messages appear press the green arrow to complete the enrolment process.
If a message pops up saying users do not have a valid email address, you will need to look at alternate methods of sending the enrolment code (such as SMS and letter, explained below)

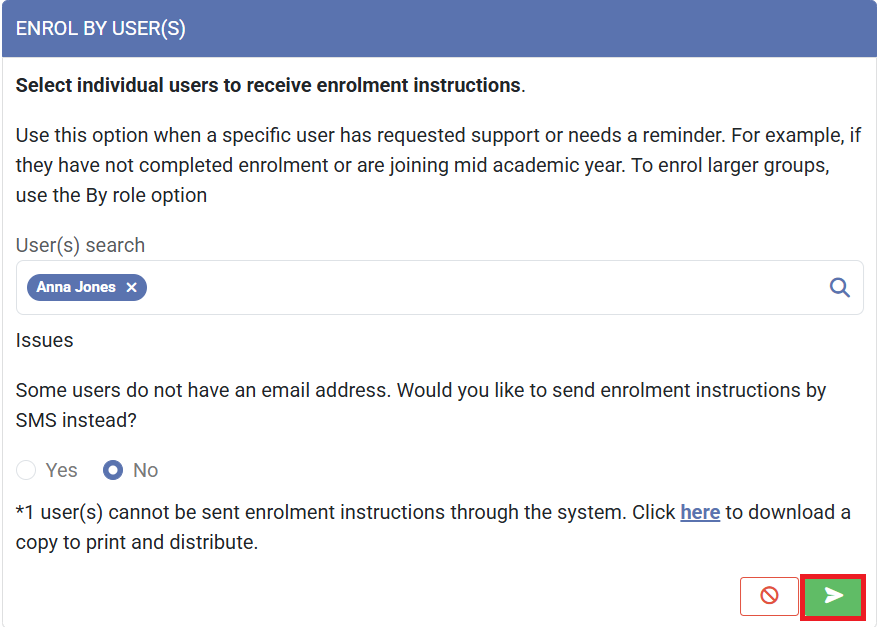
6B - Enrolling by Text (SMS)
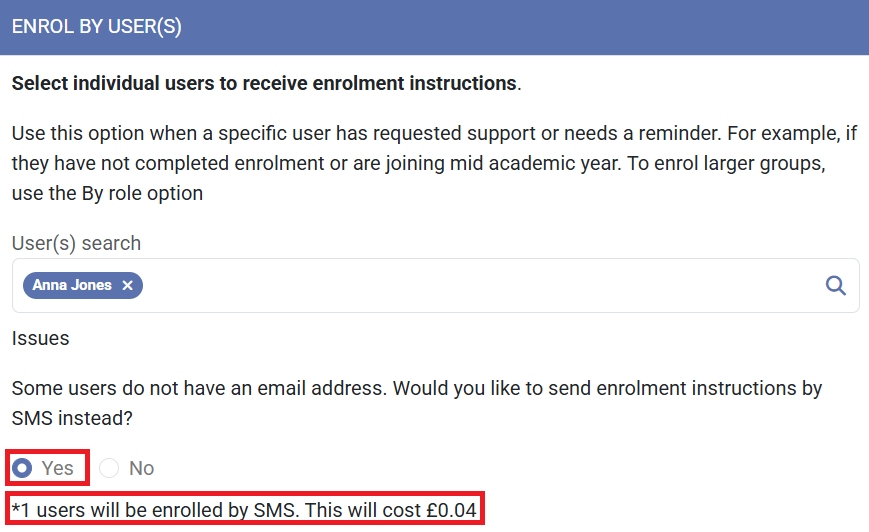
If users don't have a valid email address, you will be asked if you want to send the enrolment message via text message (SMS).
We do not recommend it as a default method of sending enrolment messages due to the cost.
However, for those users without a valid email, it may be preferable over sending letters with enrolments home.
If you select yes, an on-screen message will inform you how many users will be enrolled this way and the cost of this.
If all remaining users can be enrolled via mobile, you will see a message saying no users do not have a valid mobile number. You can then press the green arrow to complete the enrolment process.

6C - Enrolling by Letter
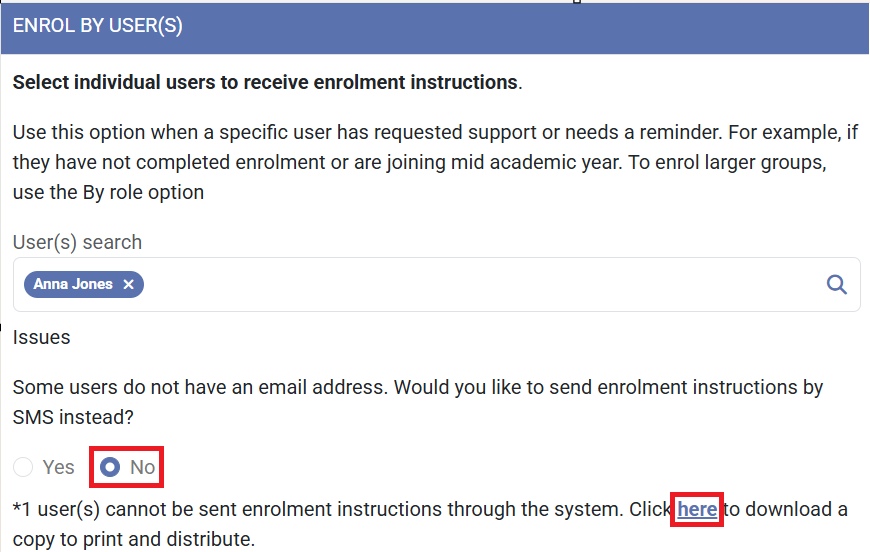
If you choose not to send enrolment instructions via SMS, or if you do not have valid telephone numbers for users, you will need to print enrolment letters. We do not recommend letters as the default method of sending enrolment messages as these can easily be lost or parents can mix up codes and merge their accounts. However, for those users without a valid email, it may be preferable to text (SMS) due to the costs.
Click the 'here' link to download the enrolment letters to be printed.
Click the green arrow to send the enrolment messages.
If you didn't generate the printed copies as you should have done, you will be prompted in the below confirmation screen to return and generate the prints. Click cancel and return to do this.
