What is a Calendar Event?
A calendar event is any key date or activity that staff add to the ReachMoreParents app to keep parents and carers informed. This can include things like school trips, term dates, parent evenings, performances, or deadlines. Once added, events appear in the app’s calendar so families can easily view what’s coming up and stay organised.
Who Can Edit or Delete a Calendar Event?
By default, school users in the following system roles will have permission to edit or delete a calendar event:
- System Administrator
- School Administrator
- Senior Leadership Team Member
- Content Managers
System Administrators have the ability to change the system permissions. Should you have difficulty accessing any of the features outlined in the steps below, please contact your school's System Administrator.
Why Should I Edit or Delete a Calendar Event?
You may need to edit or delete a calendar event when details change. For example, if the date or time is updated or if the event is no longer needed.
Making these updates ensures your calendar stays clear, current and reliable for everyone who views it.
Follow the step-by-step instructions below:
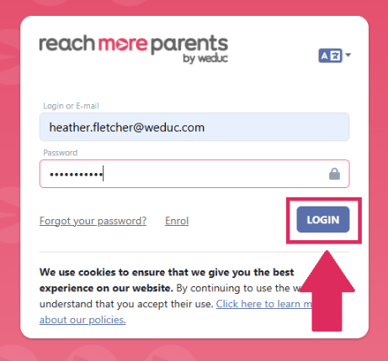
1) Login to ReachMoreParents.
2) Click the 'Calendar' icon.

3) Navigate to the event you wish to edit or delete. You can do this by clicking the arrow buttons on the top left hand side of the screen and by amending the view by selecting one of the icons on the top right of the screen.

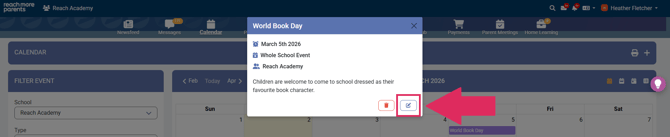
4) Select the event you wish to edit or delete.
- If you would like to edit the event, please see step 5 - Editing your Event
- If you would like to delete the event, please see step 10 - Deleting your Event
Editing your Event
5) Click the pencil icon.
6) Edit any of the appropriate fields on screen. For example, you might need to change the date and/or time.

NB: If you need any help with the fields on this screen, please refer to our 'Creating a Simple Calendar Event' guide.
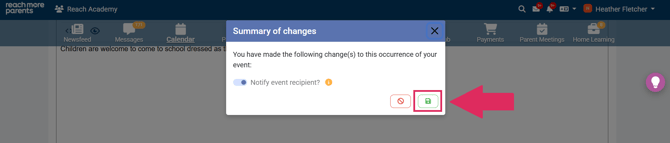
7) Scroll down and click the green save icon.

8) Choose whether you would like to notify your recipient parents of the changes you have made by turning the toggle on/off.

IMPORTANT: The notification toggle will be switched ON by default. This means that unless you switch it off, parents will be notified each time you make changes to a calendar event.
9) Click the green save icon to save the changes.
Any changes made to the event will now reflect in your ReachMoreParents web portal and the ReachMoreParents app. If the notification toggle was switched on at step 8, parents will also receive a notification to the parent app, notifying them of the changes that have been made.
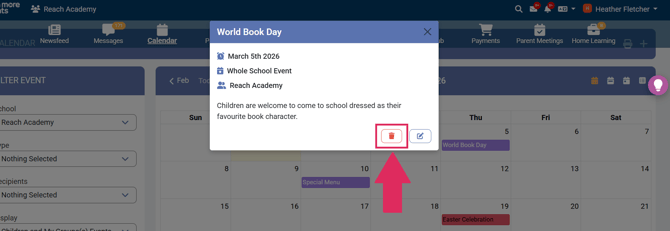
Deleting your Event
10) Click the bin icon.
11) Choose whether you would like to notify your recipient parents of the changes you have made by turning the toggle on/off.
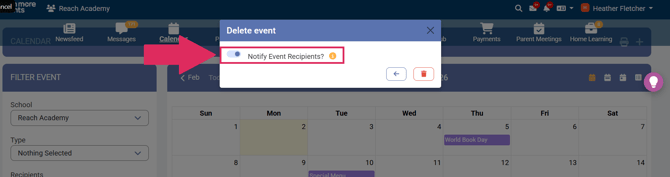
IMPORTANT: The notification toggle will be switched ON by default. This means that unless you switch it off, parents will be notified each time you make changes to a calendar event.
12) Click the red bin icon to delete the event.
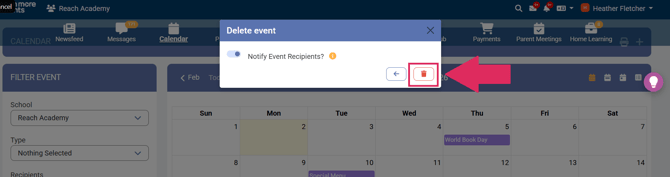
Any changes made to the event will now reflect in your ReachMoreParents web portal and the ReachMoreParents app. If the notification toggle was switched on at step 11, parents will also receive a notification to the parent app, notifying them of the changes that have been made.
Top Tips on Editing or Deleting a Calendar Event
1. Review before saving
Always double-check the summary of your changes before hitting Save or Delete. This helps prevent accidental updates or removals and ensures your calendar stays accurate.
2. Notify only when necessary
When making updates, only send notifications to parents if they need to take action (for example, if the event time or location has changed). Avoid sending notifications for minor edits (like fixing a typo), as this helps reduce unnecessary alerts and keeps communication clear and relevant.
3. Use clear event titles
When editing, check that the event title still makes sense after your changes since clear titles make it easier for parents to understand at a glance.